
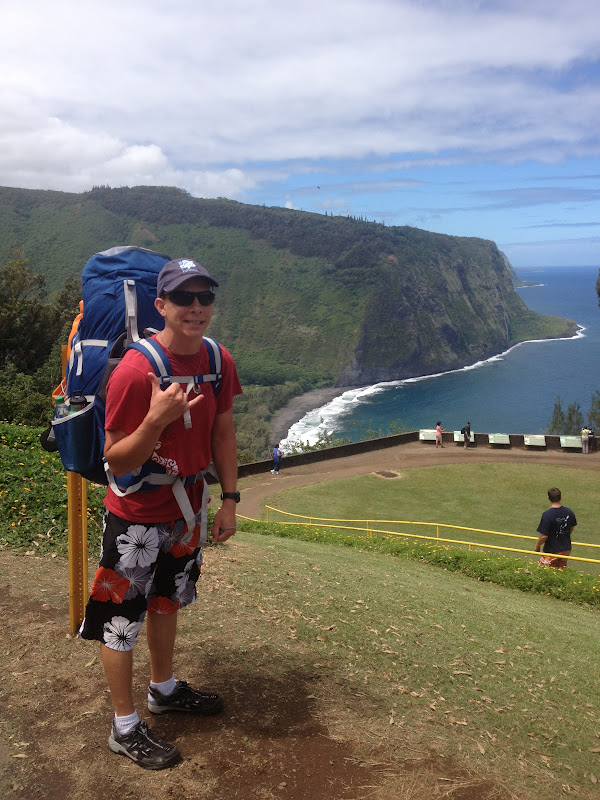
My husband heard of this hike from a friend, researched it and decided that it was something he wanted to do. I felt that he was being overzealous of our hiking skills but, I guess it's better to do something and find out, rather than not and regret it.
We realized this trip was best experienced as a hiking/camping combination. So within a week's time we found some great hiking bags (craigslist) and some very important items (will post later for those here for research) and headed that way.
This post is for those that want to hear about our trip but also for those who are researching on the trip itself. We found some pretty awesome websites, but, after we went on our trip there were still a LOT of unknowns. When it comes to being adventurous, I love the thrill of being spontaneous but there are some things that would had made our trip easier if we would have known a head of time, SO... my adventurous thrill seekers, this blog is for you as well. I hope it is noteworthy as well as enjoyable for the recreational readers :)
I had to work the morning my husband wanted to leave, so we left from Hilo as soon as I clocked out, around 10am. We learned from another person's website that it's best to park your car at the local art gallery. They charge a small fee ($30, $15 a night) but unless you know someone that can take you, or lives in the area, it's the only place you can leave your car for more than 24 hours. The drive from Hilo is about 1 hour and 45 minutes, so, If you plan on doing this hike, leave as soon as you can from the east side of the island. If driving in from the west, I would suggest renting a little B & B close to Waipio valley and then leave first thing the next morning.

The hike to Waimanu can be reached by the Muliwani trail . On the very right hand side of the map, you will see the Waipio valley lookout. If you look all the way to the left, you see the marker for the Waimanu camp grounds. It is a very hilly hike, with 9-10 "rivers" depending on the weather. It's not a trek for the beginning hiker, if you think you can do it please, by all means, go for it :)
I have heard the hike can be accomplished within 6-10 hours with many deciding factors.
1. Do you hike down the scary Waipio road, or get a ride
2. Weight of your pack, heavy-longer time, light-not as much strain
3. Weather
4. Fatigue. Stopping a lot lengthens the time of your arrival.
Our goal was to make it to our campsite just by sunset. It only gave us 6 hours with 25-50lbs of weight on our back, so we came prepared with flashlights and a backup plan (ALWAYS have one). On the map you can see there are Pink boxes marked Helipad. (Pics later) There are 4 along the way. Helipad 3 has a pretty decent covered shelter, makes you feel like you're at a park. This is a VERY good spot to stop for lunch or over night in case of bad weather, fatigue or lack of time. We were going to stop here if we were there around 6pm.

Being so stretched for time, we decided to hike down the scary Waipio trail. It's been written that if this road was maintained by the government, it would be THE steepest road in the USA, the pictures just don't do it justice. 4 wheel drive vehicles are the only ones that can do this drive, you don't HAVE to have a 4 wheel drive, but if you don't the picture below shows what can happen to your car. With a 25% grade and 1,000+ foot change in elevation in such a short amount of distance, if you trip you're going to just keep rolling down the hill.

This car remains in the woods as a reminder to those who think their cars can make the drive.


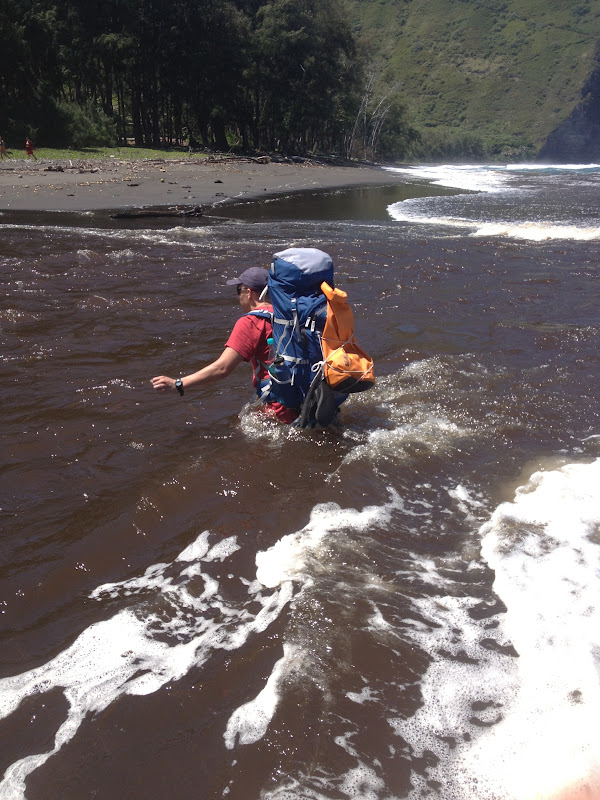
There is a crossing you must pass in order to get to the other side of the beach. From above it didn't look very bad at all. We didn't realize how rough it is until Josh took the first plunge. The tide was very high and the current...well.. lets just say it took my feet out from underneath me. The bottom of this crossing is not black sand, but lines of big boulders that are very slippery. My bag weighed 20-25lbs and so Josh came back for my bag and two men had to form a chain to help me across. As I got halfway across the path a strong wave came and took my feet from underneath me, luckily I was still holding on to one mans hand and he pushed me towards the other man. It took us about 15 minutes to get across and lost about 100 calories in adrenaline..... Malama (respect) the ocean for her forces are stronger than yours LOL
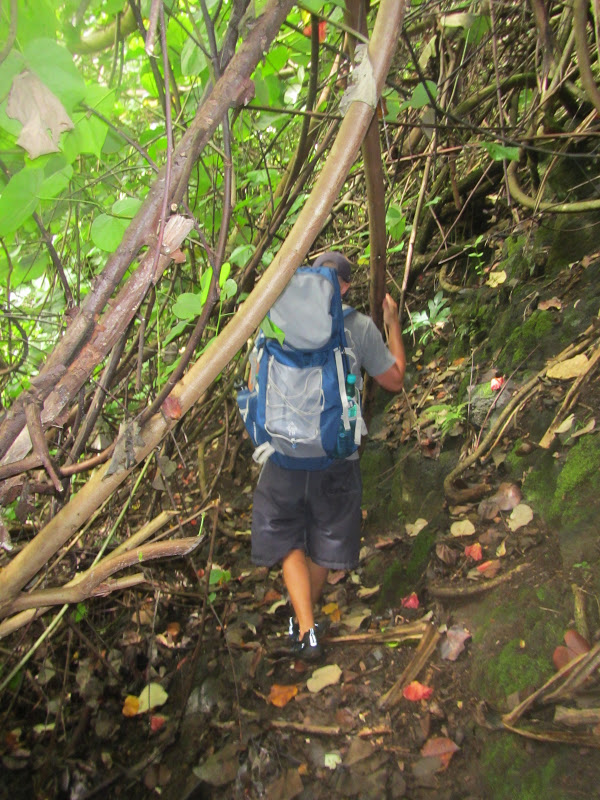
After we FINALLY crossed, and my nerves calmed down, we treked down the beach (that never ends) and found a path that led us to what is called "the Z trail"

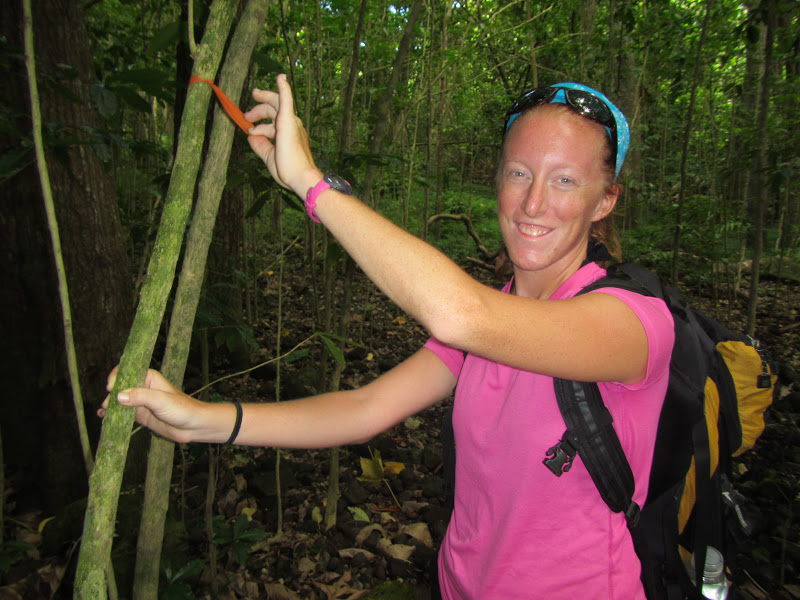
If you look closely the trail makes a faint Z that is visible even from the top of the Waipio lookout (hence the name). Only when we were coming back did we discover the marker for the beginning of this trail had a big white pole and and orange ribbon(pic below) ( I owe that to being still in shock from the river crossing)

 |
| go right onto the Waimanu trail (....duh) |

 It
ItThe next part of the trail is pretty strenuous. We spent the next hour climbing over boulders in direct sunlight (we felt as if we were in Arizona). The hike is somewhat a pain but the view of Waipio is amazing. You are able to see deeper into the valley than you can from the lookout. We took an nice water break at the top.


This hike was a great representation of just how diverse the big island is. At the beginning we were in lush forest, then hot, dry, Arizona like, then as well climbed in elevation we were in a wooden pine tree forest.

As stated before there are 9-10 "rivers" that you have to cross on this hike, most of them being in the wedge of the valleys. Depending on the type of weather the mountains have recently encountered these can be from little trickles to rapids. Luckily most were boulder hoppers, one being particularly beautiful

Along the way (as previously stated) there are 4 Helipads. I don't know if helicoptors used to land here because there wasn't much room or a platform for one to land? BUT they did have mile markers on them so, it was easy to see how far we had come, and how much farther we had left.

By the time we got to this marker we got So excited and knew we were close, unfortunately it would take us another hour and 15 minutes to get past the .9 miles. We had to hike the Z trail down into Waimanu valley.


The trip (and the last river crossing) took us about 6 hours and 10 minutes! We were very happy with our time. We extremely heavy packs, we still managed to make really good time.
The camp sites are numbered and when we signed up for our permit (hikers, yes you have to have a permit) we signed up for campsite 7. There was only one other guy in the valley, SO we just ended up picking the one with the best view and figured if someone came later we would move
 |
| Our site, #2 |
 | |
| relaxing |
The sites are pretty spread out. #1 and 2 are closest to the entrance of the camp, while 5-6-7 are a pretty far walk, but closest to water.
The camp does come with 3? (or 4) elevated outhouses


We counted about 13-18 waterfalls (you can see a lot of them in this pic, but it was beautiful!)
We spent the morning taking pictures and playing on the beach


Afterwards we knew we needed to replenish our water supply. We had heard of a natural spring with a PVC pipe. The other camper in the valley pointed us in the right direction.
(Hikers- Hike all the way to the other side of the valley, there is a sign that says *Do not enter*, ignore it and hike into the trees. You hike for about 10-15 minutes and when you come to the first little spring, hike up the mountain and you will see a waterfall with a PVC pipe attached to it).


(Hikers- you keep going like you're going to this natural spring but don't go up to the water.)....The trail was really well marked...funny enough we didn't realize it until we were headed back from the water fall.
 |
| Scary side of the mountain |


After we came back from the waterfall excursion the sun finally came out and we relaxed on the beach .
 |
| Little did we know what was waiting for us at the beach |
 |
| hello! |


 |
| Josh trying to crack open a coconut |

I wanted to yell "WE HAVE FIRE"....from Castaway :)
As we were making our fire, we heard a noise near the ocean. A couple,our age, had also made camping reservations. They were very sweet people from Kansas. We showed them where to get water and later shared our fire, and hot chocolate, after the sun set.
 | ||
| There are coconuts all over the place and guava trees on the trail down to Waimanu, it was an amazing feast provided by mother nature :) |
The first night in the valley was calm with a little bit of a shower. Our rainfly on our tent only covered horizontally (poor design) so..halfway through the night our heads and feet were getting sprinkled. We ended up just shrinking into the feetle position to avoid getting wet. Halfway through our 1st full day we noticed a tarp that was left by old campers. 30 minutes before we went to bed we draped the tarp over our tent and put rocks on the corners to keep it from flying away...BOY am I glad we did!... We had a CRAZY rain storm come through, our tent was rocking back in forth, we would have been soaked for sure! However we were very dry in the morning!
After refilling our water bottles, and eating breakfast, we packed up and started hiking out... again.....Crazy river-2, Lori-0. As stated earlier, my legs got swept out from benethe me. I was kicking...and swimming, holding on to the rope relying entirely on my upper body to hold on to the rope. I finally made it and we continued on UP the crazy Z trail.


The climb out was pretty steep and wet which made it difficult. After the 9-10 switch backs we finally made it to the top and continued our journey.
The time went fast as we spent most of our hike talking and before we knew it we were back at the Waipio Z trail.

We took one last look and continued our descent.
Upon reaching the black sand beach Josh couldn't help but play with a friend he found on the beach


While hiking up the Z trail in Waimanu we ran into a guy that asked us about the waterfall. Supposedly he ran the entire way back and met us at the river crossing. After he crossed he GRACIOUSLY offered us a ride back up the Waipio valley road. He saved us a ton of leg work and probably and hour and 1/2 of our time.

The guy let us ride in the bed of his truck. His tailgate was open and
because of the steepness of the road is I had to prop my foot up on a bar to
keep from sliding out..

It was an amazing hike/camp. I'm so glad we did it :)
This page is already very long winded, SO i'm going to post a Part 2 for hikers tip's, a packing guide, and things we discovered in Pt 2.
Thanks for reading!
This comment has been removed by the author.
ReplyDeleteHEY! I'm so sorry I never got back to you about the permit question! I was actually on a 5 day vacation when you commented on this post!
DeleteFirst of all, thanks for reading!
2nd.. ok, the answer to your question is tricky.
I am OCD about having a camp spot, especially #2, it's the most BEAUTIFUL down there. Every time we went to this camp we only encountered 2-3 people, never any official . If you're only going for a day or 2, i don't think it would be a big deal, but it's the right thing to do.
If you're going for 5-6 days I would highly suggest it. We paid both times, just to cover our butts , however were never questioned about it nor encountered anyone questioning our reservation?
Hope this helps!
OH, sorry, also, I can't remember exactly how it is, but it wasn't too terrible expensive, somewhere around $7-$12 I think??
ReplyDeletewhich isn't bad at all. Hawaii has one of THE CHEAPEST camping permits out of anywhere i've been (yellowstone wanted $20 a day to camp)
GOOD LUCK, I hope you have fun!
I'm heading out tomorrow. The charge is 19.80 for non residents. So much for cheapest camping permits out of anywhere you've been!
ReplyDeleteDude, 3 things. A. This was posted 2 years ago. I've since moved from the Island, The price could have increased. B. I've paid much, much more for camping permits. In fact I'm paying $49.00 for 3 nights (at a discounted rate ) for Yosemite next week. I'd rather pay the $19.00. C. You're more than welcome to go pay $90 a night to go stay in a roach motel in Kona.... Aloha..I hope you enjoy Waimanu.
DeleteIt’s very Informative Thanks for sharing With Us. Good job keep it up
ReplyDeleteUrban Aero Systems as an Aviation Infrastructure company that aims to introduce cutting-edge aerospace support technologies into India and provides Helipads in India, Helipads in Bangalore and Aluminium Helipads